When working with files on azure blob storage, you may want people to access files via a custom domain rather than the blob.core.windows.net path provided. To do so involves a few steps both inside and outside the Azure portal.
Step 1
Navigate to your Azure storage account and go to Settings > Endpoints in the storage account blade.
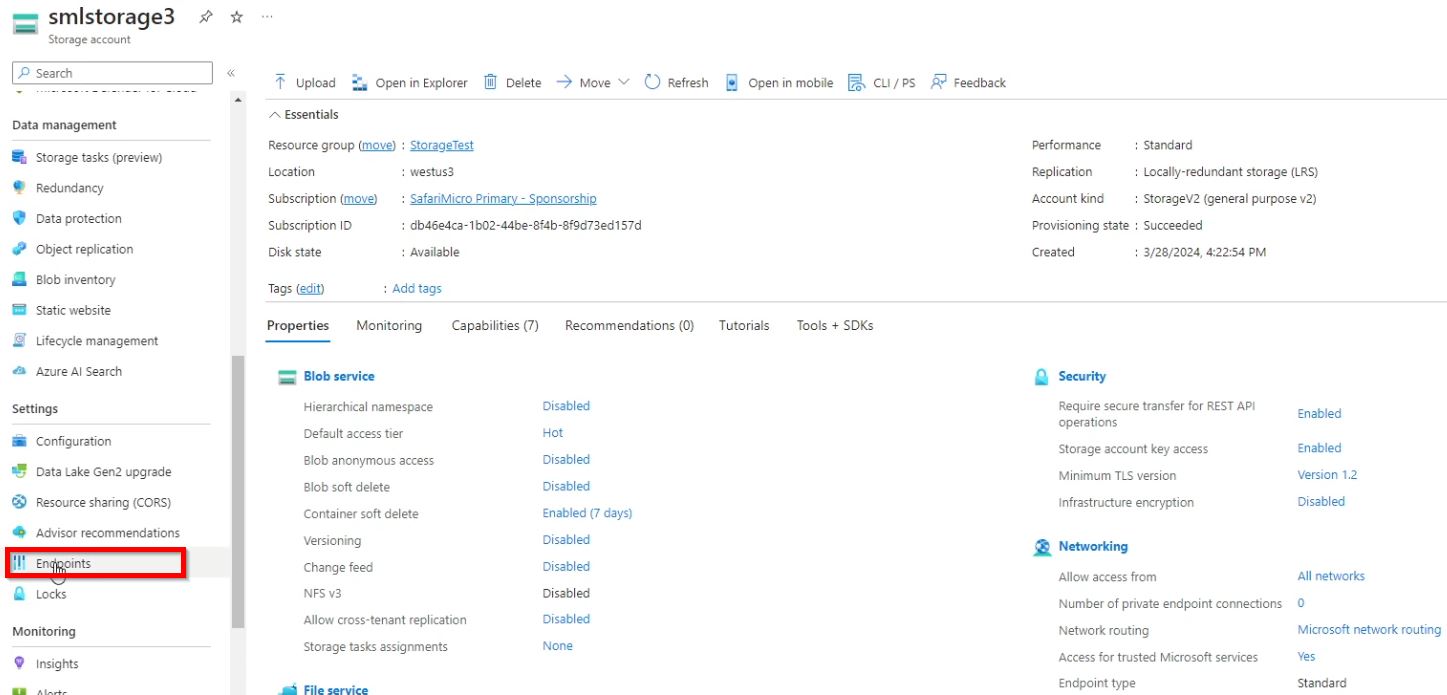
Step 2 – Grab Blob Service URL
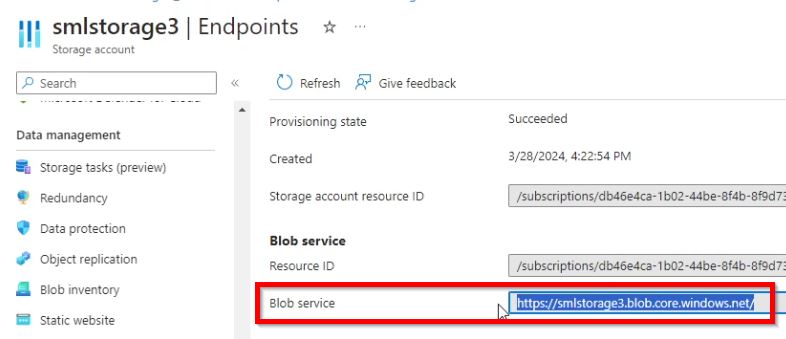
From Endpoints, locate the Blob Service url and copy it into a notepad. In this case I have a storage account called smlstorage3 with a blob service url of https://smlstorage3.blob.windows.net/
Remove the https:// and / at the beginning and end of the url. In my case the result is smlstorage3.blob.windows.net
Step 3 – Create External DNS Record
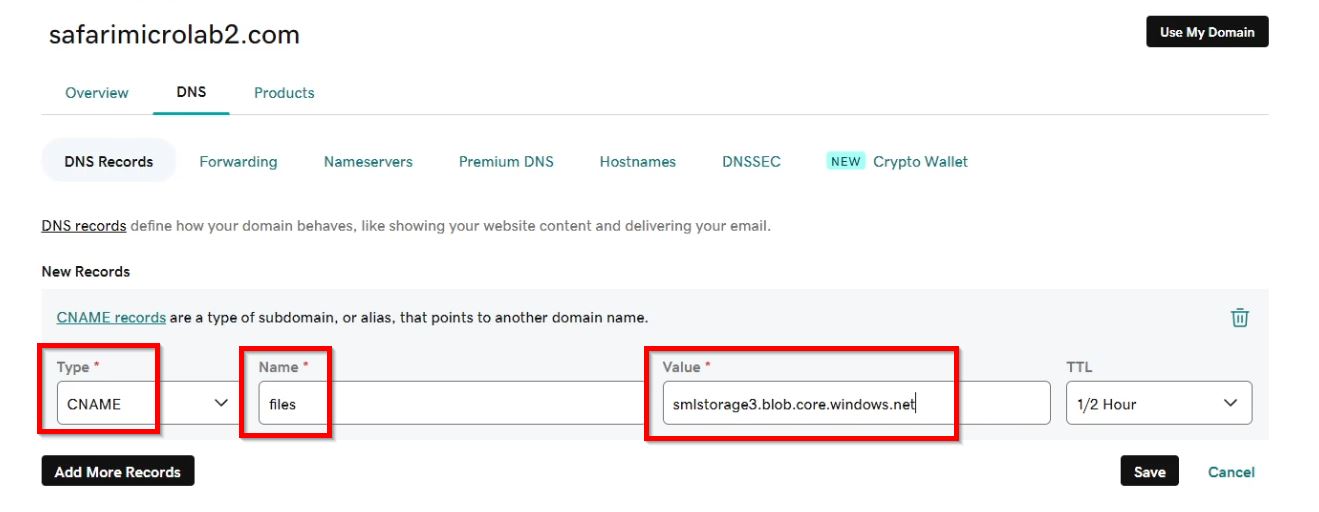
In the external DNS for your custom domain, create a CNAME record with the name you want to utilize. The value will then be the Azure Blob service value from the previous step. So in my case I want to use files.safarimicrolab2.com to access my blob storage, and safarimicrolab2.com is h hosts its DNS with Godaddy. So then from within Godaddy I create a CNAME record named files that points to smlstorage3.blob.core.windows.net (just used default TTL). This ultimately creates a files.safarimicrolab2.com record that goes to my azure blob storage.
Note: If you use this same custom domain in an internal DNS (For instance if I was using safarimicrolab2.com for my Active Directory) you’ll need to also create this record in the internal DNS zone for computers using that internal DNS to get to azure storage by this custom domain.
Step 4 – Add Custom Domain to Storage Account
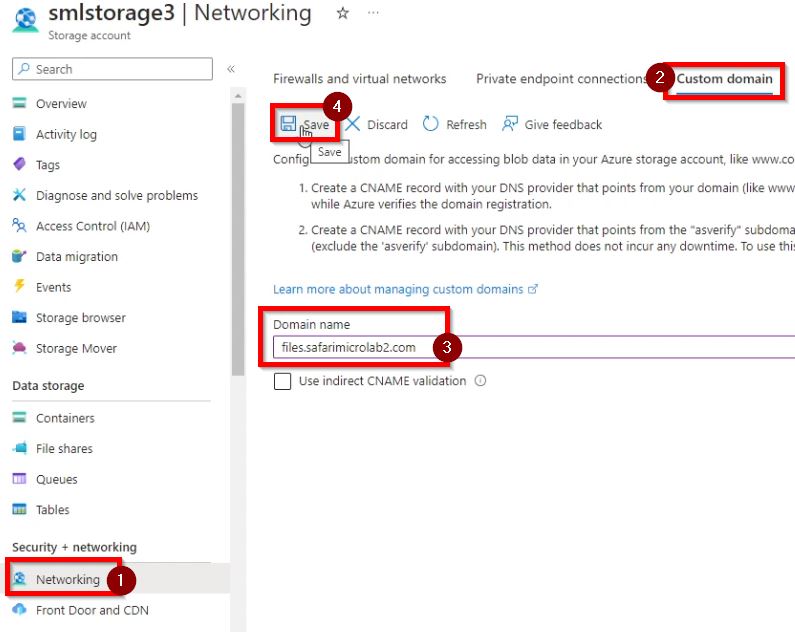
Go back to your Azure storage account and on the storage account blade navigation to Networking under Security + networking. Then select the Custom domain tab and in the Domain name field provided enter your custom domain name you want to utilize for the storage account. In this case I’m using files.safarimicrolab2.com. Then select Save.
Step 5 – Disable Secure Transfer and Enable Blob anonymous access (if not using SAS)
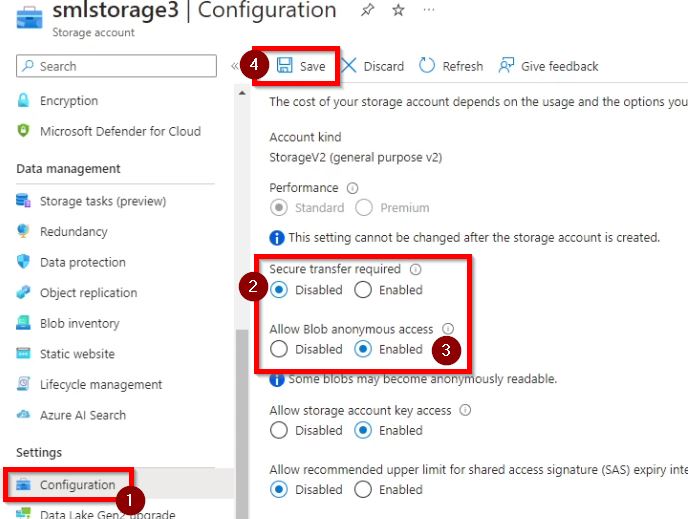
At least for this blob post, we don’t want to go through setting up HTTPS access with TLS certificates, so we’ll want to turn off ‘Secure transfer required. Also if you want people to be able access your files on blob storage publicly without having to authenticate, you will need to enable ‘Allow blob anonymous access’. If however, you want to provide access via a Shared Access Signature (SAS), you do not need to change these settings.
To do this go to your Azure Storage blade and select Configuration under Settings and then select Disabled for Secure transfer required and Enabled for Allow Blob anonymous access. Then select Save.
Give this a few minutes to update before trying to access your files.
Step 6 – Access your Files
In my case I have a container called myfolder and inside it is a file called Test.txt
I can navigate to http://files.safarimicrolab2.com/myfolder/Test.txt in a browser. and see the contents for test.txt
Other files that cannot be opened within the browser session simply download.

If using SAS
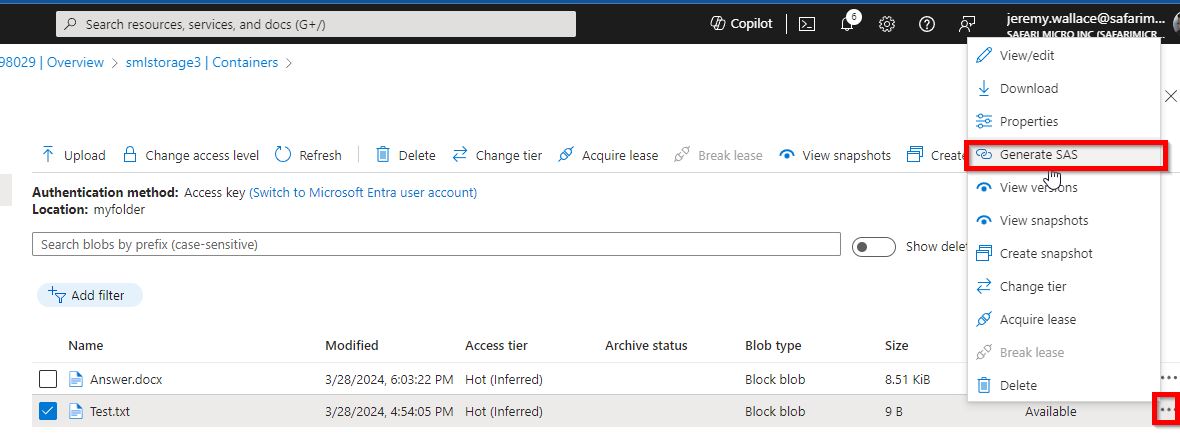
If instead you are using a Shared Access Signature, you can navigate to the files within your container and select the “…” and ‘Generate SAS” from the menu.
Scroll to the bottom of the resulting blade and select “Generate SAS token and URL” and copy the Blob SAS URL
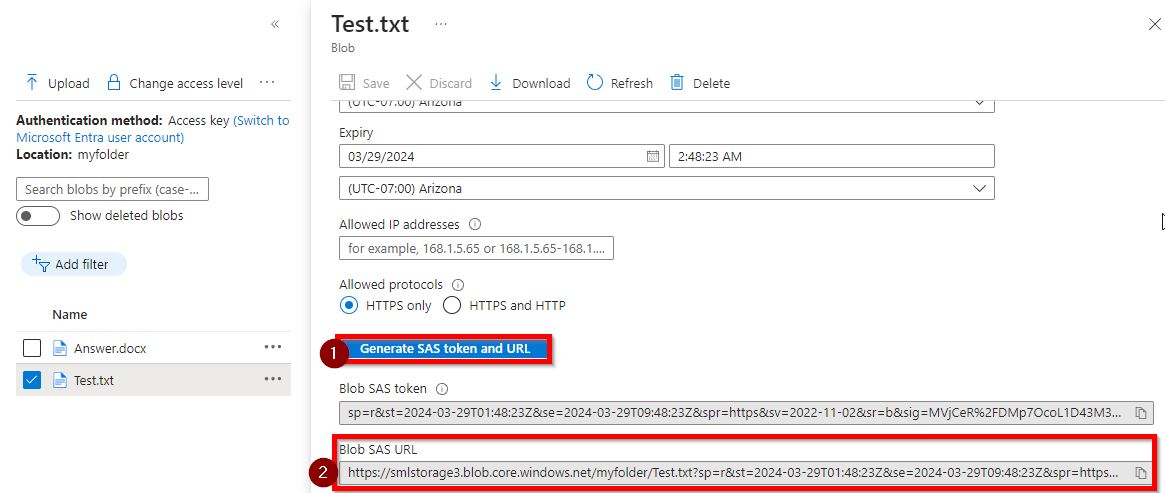
Modify the resulting Blob SAS URL to use your domain name, in my case, files.safarimicrolab2.com the resulting url can be provided for SAS access to your file on Azure Blob Storage.

